Penetrating Damp vs Rising Damp: Identifying Signs, Causes and Practical Remedies
Damp can look the same whether it’s creeping up from the ground or seeping through an external wall, but the cause dictates the fix and the cost. You can tell penetrating damp from rising damp by where the moisture appears and how it behaves: rising damp comes from the ground and shows a tide mark at low levels, while penetrating damp enters horizontally from outside and shows patches higher up or after rain.
You’ll learn clear, practical signs to spot on walls, floors and roofs so you can diagnose the problem quickly and avoid wasted repairs. The article then breaks down the key differences, simple inspection steps you can use at home, and answers to common doubts so you know what to do next.
Key Differences Between Penetrating Damp and Rising Damp
You will learn which type of damp comes from above versus from the ground, how each shows on walls and materials, and common mistakes that lead to wrong diagnoses.
Defining Penetrating Damp
Penetrating damp occurs when water breaches the building envelope and soaks into walls, ceilings or floors. Typical entry points include damaged roof coverings, cracked pointing, defective flashings, blocked gutters and poorly sealed window or door surrounds.
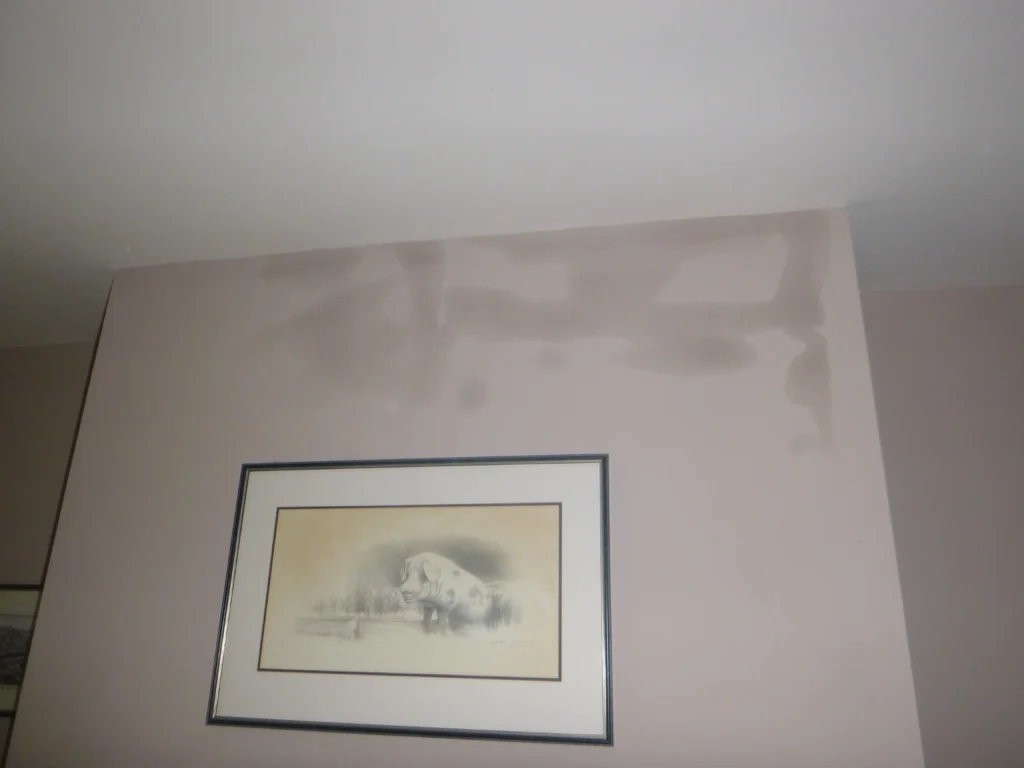
You will often see wet patches that track vertically and horizontally from the point of ingress, and staining may extend well above the skirting or mid-wall level. Materials affected by penetrating damp tend to remain damp until the source is repaired, and timber or plaster may rot or delaminate close to the leak.
To diagnose penetrating damp, inspect the exterior for visible defects, test around windows and rooflines, and check for wetness that correlates with heavy rain or specific wind-driven directions. Temporary drying does not indicate a permanent fix.
Understanding Rising Damp
Rising damp is capillary movement of ground water up through porous masonry when a damp-proof course (DPC) is missing, bridged or failed. It usually appears at the lowest part of internal walls, commonly up to about 1 metre, though salts and wall material can modify the visible height.
You will often find a horizontal “tide” or damp mark at a consistent band around rooms, together with salt deposits (white efflorescence) and plaster that flakes or crumbles. Rising damp frequently affects skirting boards and lower plaster more than upper walls, and symptoms persist regardless of recent rainfall.
Confirm rising damp by checking the age and condition of the DPC, performing a moisture profile up the wall, and testing for hygroscopic salts; a localized patch of wet plaster higher on the wall usually points away from rising damp.
Visual Signs and Patterns
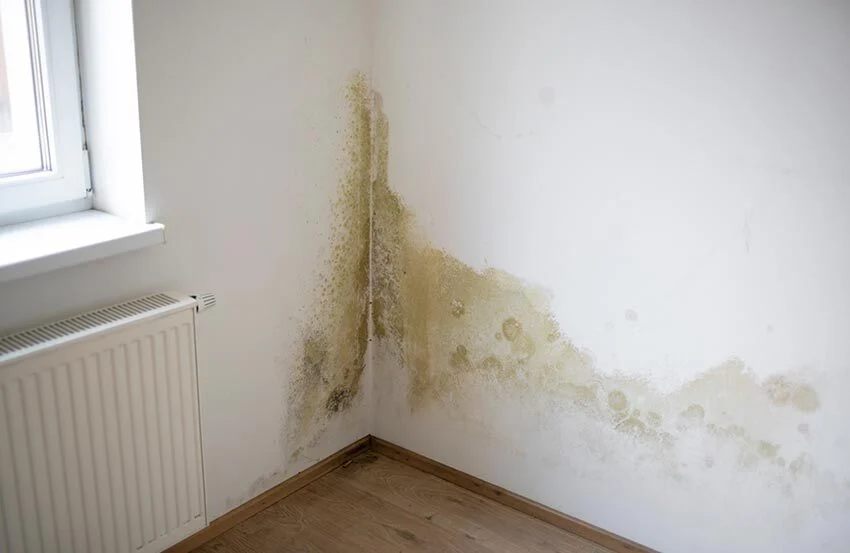
Penetrating damp shows irregular, often patchy staining that traces from external faults; the wet area may move with heavy rain and is not confined to the base of the wall. You may see mould growth in sheltered spots, peeling paint where water runs, and damp staining on plaster that follows mortar lines or cracks.
Rising damp typically displays a regular lower-band stain with a distinct top edge and salt deposits on the plaster surface. Timber skirtings and floorboards may show damp-related decay at their lower edges, while higher wall areas remain dry.
Use this quick checklist: penetrating damp = localized, rain-correlated, source above or through wall; rising damp = consistent lower-level band, salts present, source from ground.
Common Misconceptions
People often mistake condensation or plumbing leaks for rising or penetrating damp; condensation concentrates on cold surfaces and forms mould in corners, while plumbing leaks produce persistent localized wet patches unrelated to weather. Do not assume that any lower-wall damp equals rising damp without testing for salts and a failed DPC.
Another myth is that rising damp reaches very high levels in normal circumstances; unusually high damp lines usually indicate a different cause such as penetrating damp, internal leaks, or saturated external ground levels. Replastering over damp without addressing the source frequently causes recurrent problems and hides diagnostic clues.
When in doubt, use moisture readings, visual inspection of external fabric, and targeted testing rather than relying on assumptions or cosmetic fixes.
How to Accurately Identify Damp Issues
You need focused inspection techniques, the right tools, and a clear understanding of likely causes to separate rising damp from penetrating damp. Use objective signs and measurements rather than guesswork.
Inspection Methods and Tools
Start with a visual sweep indoors and outdoors. Look for tide marks on internal walls, salt deposits (white crusting), peeling paint, and skirting-board rot; mark locations and note height above floor level. Use a torch and mirror to inspect behind furniture and inside cupboards where damp often hides.
Carry a moisture meter to record relative moisture content at several heights on the affected wall. Take readings at floor level, 300–600 mm, and 1.2 m to spot a rising profile. Use a thermal camera or infrared thermometer to find cold spots and external leaks that cause penetrating damp.
Check external elements too: examine pointing, render, gutters, downpipes, and flashings for cracks, blockages, or failed seals. Photograph evidence and log readings so you can compare before-and-after repairs.
Professional Assessment and Diagnosis
If readings and visual checks leave doubt, commission a damp specialist or chartered surveyor. They will perform a full-site damp survey, using calibrated meters, hygrometers, and sometimes borescopes to inspect cavity walls and roof spaces.
Ask for a written diagnostic report that lists tests performed, moisture maps, and clear identification of the damp type with evidence. Insist the report states whether a damp-proof course (DPC) is present and effective, and whether timber decay or mould testing is needed.
Professionals may carry out destructive tests—removing small sections of plaster—or apply salt analysis to confirm rising damp salts. Request recommended remedial actions with timescales and cost estimates.
Typical Causes and Contributing Factors
Rising damp most commonly results from a failed or absent DPC, bridging by earth or paving, and porous brickwork drawing moisture up by capillary action. It usually produces a regular band of damp affecting the lowest 1 m of internal walls, often with salt staining and plaster degradation.
Penetrating damp occurs when water enters sideways through damaged masonry, poor pointing, leaking gutters, or defective flashing. Signs include irregular wet patches at any height, damp on external walls that mirrors internal patterns, and staining after heavy rain.
Contributing factors include blocked gutters, poor ground grading, external plumbing leaks, and cracked render. Internal condensation and high humidity can coexist and mask other damp types, so treat humidity control and ventilation as part of your diagnostic checklist.
Frequently Asked Questions
These answers explain visible signs, likely causes, typical damage, and reliable treatments for rising and penetrating damp. They focus on what you can check yourself and what specialists commonly do to confirm and fix each problem.
What are the distinguishing characteristics of rising damp compared to penetrating damp?
Rising damp moves up from ground level through masonry by capillary action and often sits at skirting height. You’ll see a horizontal tide mark, salt deposits (white powder), and peeling paint or plaster at low levels.
Penetrating damp enters from the outside through defects such as cracked pointing, failed flashing, or leaking gutters. It shows as irregular wet patches, often higher on walls, and may appear after heavy rain or in specific locations where water breaches the exterior.
How does the presence of a damp-proof course influence damp issues within a home?
A properly installed, intact damp-proof course (DPC) blocks ground moisture from rising into walls. If the DPC is missing, defective, bridged (by soil, paving, internal finishes), or chemically failed, rising damp can develop.
A DPC has little effect on penetrating damp, which bypasses the DPC by entering through external faults. You must repair external fabric failures independently of the DPC to stop penetration.
Can the location of damp patches on walls indicate whether it's rising or penetrating damp?
Yes. Damp concentrated at floor level and spreading upwards in a band strongly suggests rising damp. Check for a consistent height around the room and salt staining to confirm.
Damp patches higher on the wall, isolated spots, or areas opposite external defects usually indicate penetrating damp. Look for correlations with rain, rooflines, windows, or adjacent wet areas.
What kind of damage does each type of damp typically cause to a property?
Rising damp commonly damages plaster, skirting boards, and floor finishes near the base of walls. Long-term exposure can weaken mortar and cause timber decay at ground level.
Penetrating damp can affect plaster and paint anywhere water enters, plus timber, insulation, and finishes in localized spots. Recurrent penetration can lead to mould growth and structural timber rot if left unaddressed.
What are the most effective treatment methods for each type of damp?
Treat rising damp by installing or renewing a DPC (physical or chemical injection), removing contaminated plaster, and replacing skirting or timber as needed. Improve external ground levels and ventilation to prevent re‑occurrence.
Treat penetrating damp by locating and repairing the external cause—repairing pointing, replacing flashing, fixing gutters, or re-rendering. Internally, dry out and replace damaged finishes; address mould with appropriate cleaners and vapour control.
How can a professional diagnose the difference between rising and penetrating damp?
A surveyor will inspect external fabric, internal wetting patterns, and measure moisture using a hygrometer or moisture meter. They may test for soluble salts, check DPC presence/height, and watch how damp changes after rain or drying.
They may also use invasive probes or borehole tests for moisture profiling and take photos to document the pattern. Use their written report to confirm cause and recommended remedial works.