Fix Cracks Walls Quickly and Permanently With Expert Repair Techniques
Cracks in your walls can do more than look unsightly; they may signal problems that affect your home’s safety and fabric. Addressing cracks promptly helps prevent issues such as penetrating damp, mould and progressive structural damage that can become costly if left unattended.
This guide explains what causes different types of wall cracks, how to judge their severity and step-by-step methods to repair both internal and external damage. It also highlights when to call a professional so you can protect your property and avoid small problems becoming major repairs.
What causes cracks in walls?
Cracks in your walls usually come from a handful of common causes, each affecting materials and structure differently. Weather plays a big part: repeated wetting and drying, plus temperature swings, make timber, plaster and masonry expand and contract, producing hairline splits over time. High humidity or persistent rain can also weaken finishes and joints.
Ground and foundation movement force structural shifts that show up as cracks. Clay soils that swell when wet and shrink when dry are especially likely to cause movement, and local subsidence or soil erosion can lead to larger, jagged faults. New houses often settle as foundations compress; this ordinary settling typically causes minor, non-structural cracking.
Construction quality matters. Poorly mixed concrete, inadequate curing, or low‑grade materials increase the chance of cracking as loads and weather act on the building. Structural stress from extensions, heavy loads, or nearby excavation can create wider, more serious cracks that need professional assessment.
Water penetration into walls accelerates deterioration. Leaks from pipes, roofs or gutters soak materials, reduce cohesion and can turn small defects into larger cracks. Keep an eye on crack pattern and width: very wide, stair-step, or horizontal cracks often indicate a deeper problem, whereas fine, hairline cracks more commonly reflect normal movement. Use the checklist below to spot likely causes quickly.
- Weather-related expansion and contraction
- Ground movement, soil settling and subsidence
- Normal house settling (especially in new builds)
- Poor construction or materials
- Structural stress from alterations or nearby works
- Water leaks and prolonged dampness
Types and severity of cracks in walls
You can tell a lot from a crack’s direction, width and location. Use this quick guide to judge how urgent a repair might be.
Fine surface cracks (hairline). Thin fissures in paint or plaster. They usually stem from drying or minor settling and are cosmetic; decorating or a thin filler often fixes them.
Vertical splits. Cracks running up and down commonly result from gradual settlement or thermal movement. Most are low risk, but monitor any that grow in width or length.
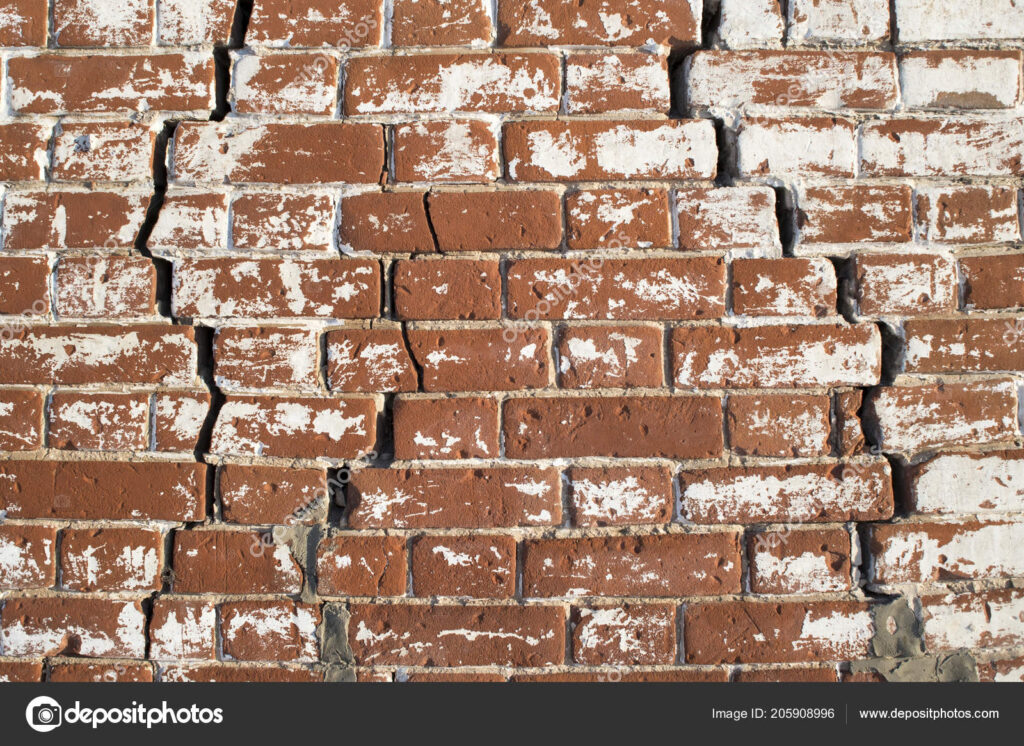
Horizontal fractures. These run side-to-side and can signal serious problems, like foundation movement or lateral pressure from soil. Arrange a structural inspection if you spot one.
Diagonal or stepped cracks. Angled cracks—especially around openings—often indicate uneven settlement. Severity varies; small, stable ones may be patched, while widening or offset cracks need professional assessment.
Bold any repairs you attempt, record changes over weeks, and treat widening or new cracks as potential structural warnings.
Step-by-step guide to fixing internal wall cracks
1. Assess the crack and its severity
Carefully inspect the crack to judge its width, length and pattern.
Note any changes over days or weeks; movement suggests a deeper problem that may need professional assessment.
Check for associated signs like sticking doors, sloping floors or damp, which could indicate structural or moisture issues.
2. Gather tools and materials
Collect the essentials before you start to avoid interruptions.
Suggested items:
- Putty knife or filler knife
- Utility knife or chisel and small hammer
- Stiff brush and scraper
- Sandpaper (medium and fine grit)
- Interior filler or plaster / patching compound
- Primer and matching paint
- Dust sheet, dust mask and safety goggles
3. Prepare the work area
Protect nearby surfaces with dust sheets and move furniture away from the wall.
Remove loose plaster or flaking paint with a brush and scraper so the repair material can bond.
Widen narrow cracks slightly with a utility knife or chisel to create a V-shaped groove; this improves adhesion.
Clear dust with a brush or vacuum and wear eye and respiratory protection while working.
4. Repairing fine hairline and small cracks
Scoop filler into the crack using a putty knife, pressing firmly so the compound fills the cavity.
Smooth the filler flush with the wall and remove excess; aim for a level surface to reduce sanding later.
Allow the filler to dry fully according to the manufacturer’s instructions.
Sand the repaired area with fine-grit paper until smooth and feather the edges to blend with the wall.
Prime the patch, then paint to match the surrounding finish.
5. Repairing wider or deeper cracks
Open out the crack to a uniform V-shape using a chisel and hammer, removing any unstable material.
Apply a bonding agent if recommended, then build the repair with a patching compound in thin layers, allowing each layer to set before applying the next.
For very wide gaps, consider backing the void with mesh tape or a setting-type filler to add strength.
Once the final layer is dry, sand flat and blend the edges smoothly into the surrounding plaster.
Prime the repaired zone and repaint to achieve a consistent appearance.
Tips for a durable repair:
- Use setting-type fillers for deep repairs to reduce shrinkage.
- Match primer type to your paint (e.g. water-based or alkyd).
- Allow adequate drying time between steps to avoid cracking or adhesion failure.
When to get professional help:
- Cracks that widen or reappear after repair.
- Long, diagonal cracks near doors and windows linked to movement.
- Visible structural issues, moisture ingress or recurring damage.
Step-by-step guide to fixing external wall cracks
1. Gather the necessary kit
Make a checklist of materials and tools before you start. Typical items include exterior-grade sealant, masonry patching compound, a waterproofing product, a trowel, a stiff brush, sandpaper, a caulking gun and safety kit (dust mask, goggles, gloves).
Keep a bucket of clean water and rags nearby for cleanup.
2. Get the wall ready to work on
Clear loose material from the crack with a brush, then open the crack slightly with the trowel so the repair material can key in. Sweep away dust and debris and rinse if required; allow the area to dry. Protect nearby surfaces with tape or drop cloths and wear eye and respiratory protection.
3. Repair narrow or hairline cracks
Load exterior sealant into a caulking gun and force it fully into the gap. Use a scraper or wet finger to smooth the bead and remove excess. Let the sealant cure to the manufacturer’s recommended time before touching or painting.
4. Repair wide or deep cracks
Push masonry patching compound into the crack in successive layers, compacting each layer and allowing it to dry. Once level, sand back to a smooth finish. Coat with a suitable waterproofing solution and repaint to match the surrounding finish.
How to stop cracks forming in your walls
Control damp and wetness around your property. Keep gutters clear, make sure soil and paving slope away from the foundation, and use downpipe extenders so rainwater does not pool by walls. Inside, ventilate rooms, use extractor fans in wet areas and consider a dehumidifier where condensation is persistent.
Protect the foundation and surrounding ground. Check soil moisture after dry spells and heavy rain, and avoid planting trees or large shrubs too close to the house to reduce root movement and drying of clay soils. Repair any drainage faults promptly.
Choose materials that tolerate movement. Use quality plaster or drywall compounds, flexible sealants around joins and exterior-grade paint that resists moisture. These choices reduce the chance of hairline and shrinkage cracks.
Keep temperatures steady. Improve insulation and avoid rapid heating or cooling that causes building materials to expand and contract. Regularly inspect walls and make small repairs quickly to prevent minor defects becoming bigger problems.
When to Call a Professional
If you spot large or growing cracks, or several new cracks appearing across different walls, get a professional to inspect them. These signs can point to movement or structural stress that DIY repairs won’t fix.
Arrange an inspection if you see associated problems like sagging floors, bowed walls or doors and windows that no longer close properly. Those symptoms often mean deeper issues that need engineered solutions.
Hire a tradesperson when the repair is beyond your skills or confidence. A qualified contractor will assess causes, recommend appropriate repairs, and prevent recurring failures.
If you suspect damp or timber decay alongside cracks, request a specialist survey. A surveyor can detect hidden moisture or rot and advise on combined structural and remedial work.
Frequently Asked Questions
What’s the simplest way to repair small cracks in plaster walls?
For fine cracks, widen the crack slightly with a scraper or utility knife to remove loose material. Apply a ready-mixed filler or setting-type plaster with a putty knife, press firmly, then smooth flush with the surface. Once dry, sand lightly and redecorate.
Can very thin cracks in your walls mean there’s a structural issue?
Hairline cracks are often cosmetic and caused by normal settling, temperature changes or shrinkage. Be concerned if cracks are diagonal, wider than about 3 mm, or appear suddenly and near windows, doors or corners — these signs can indicate movement or subsidence and warrant further inspection.
How do you stop repaired cracks from coming back?
Address underlying causes first: control moisture, fix leaks, and stabilise uneven foundations if needed. Use appropriate repair methods — flexible fillers or joint tape over joints — and apply reinforcing tape or mesh for recurring cracks before replastering. Keep indoor humidity and temperature stable to reduce movement.
Which materials and tools do you need for a dependable crack repair?
Essential items: filler (ready-mix spackle, setting compound or plaster), reinforcing tape or mesh for wider cracks, a putty knife or trowel, sandpaper, primer and paint. Optional: a scraper, utility knife, dust sheet, and a small brush for cleaning the crack before repair.
How long will a typical drywall crack repair take?
Minor drywall repairs usually require one to two hours of active work (cleaning, filling, sanding). Allow drying times between coats — commonly several hours to overnight depending on the product — so total turnaround can be 24–48 hours before priming and painting.
Do you need a tradesperson for small wall crack repairs?
You can usually fix small, non-structural cracks yourself with basic tools and materials. Hire a professional if the cracks are large, growing, accompanied by doors/windows sticking, or if you suspect structural movement; a surveyor or structural engineer can assess risk and recommend repairs.