How Rising Damp Is Treated in Older UK Homes (And What Actually Works)
You often notice peeling paint, tide marks or salt stains and wonder whether a quick DIY fix will stop the problem. Rising damp in older UK homes usually needs an accurate diagnosis and a targeted repair—simply repainting or plastering over the damage rarely works long term. The treatments that actually work focus on removing the source of moisture (usually by installing or repairing a damp-proof course), then treating salt-damaged plaster and improving ventilation and drainage to prevent recurrence.
This guide shows how to identify rising damp correctly, compares proven treatments (like chemical and physical DPCs, salt remediation and improved ground drainage), and explains what to expect from professional work versus DIY attempts. You’ll learn which approaches give lasting results and which common “solutions” waste time and money.
Identifying and Understanding Rising Damp in Older UK Homes
Rising damp draws moisture up from the ground into masonry, often leaving telltale stains, salt deposits and damaged plaster. You need to spot specific signs, understand why traditional buildings are vulnerable, and recognise common misdiagnoses so you can choose the right treatment.
Common Signs of Rising Damp
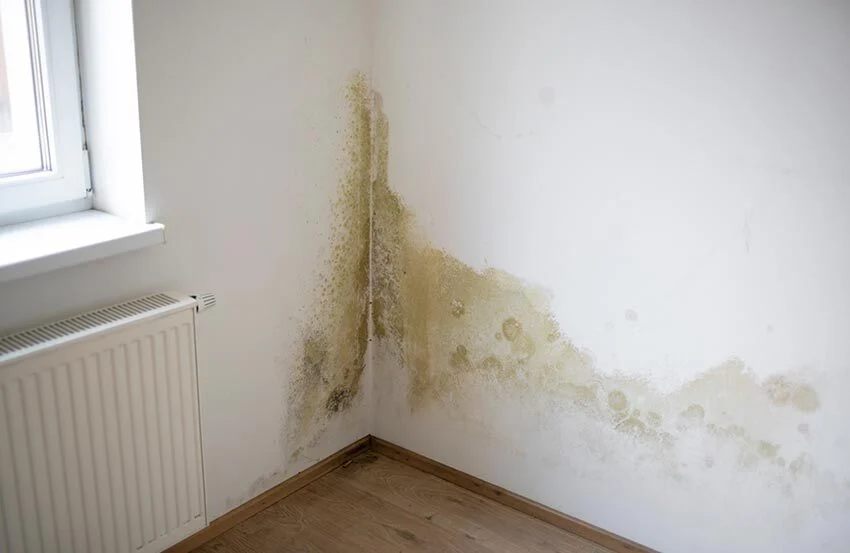
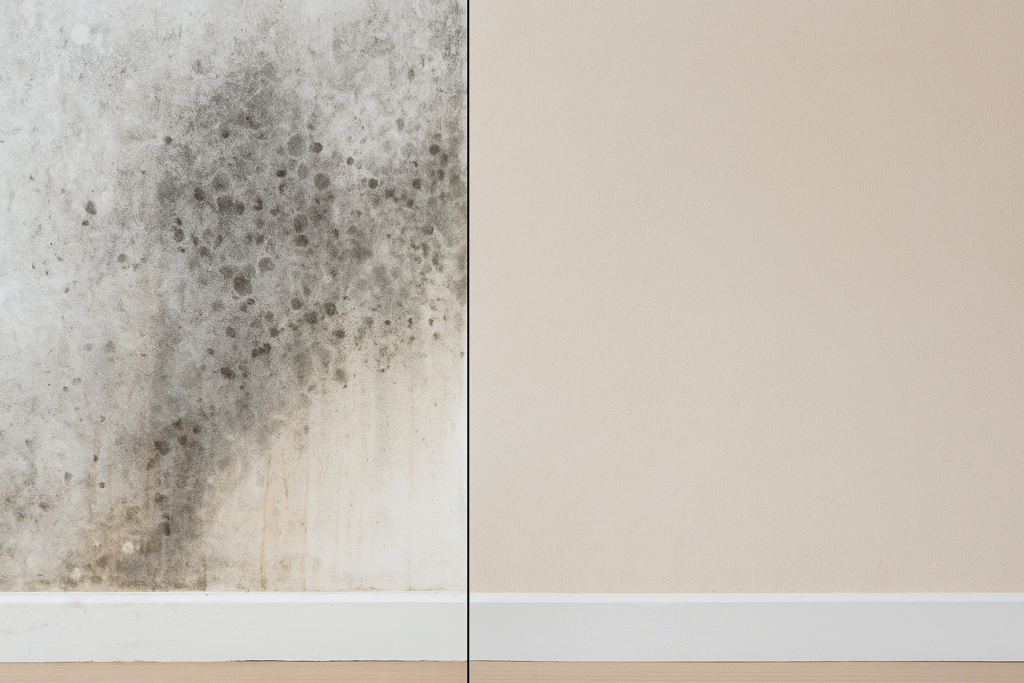
Look for a tide mark on internal walls, usually up to 1–1.5 metres high, where paint peels or plaster crumbles. You’ll often see powdery white salts (efflorescence) on plaster or brick, and a musty, persistent odour in ground-floor rooms.
Timber skirtings and floorboards near external walls may rot or swell. Wallpaper near the floor will blister or detach. Damp patches that reappear after drying strongly suggest a moisture source from the ground rather than condensation.
Use a moisture meter to confirm high dampness in the lower wall course. Photograph defects and note affected rooms; this evidence helps a surveyor determine whether rising damp is present or another problem is causing the symptoms.
Why Older Homes Are Susceptible
Many older UK houses were built before a continuous damp-proof course (DPC) became standard practice. Original DPCs, if present, can be damaged by renovation, ground levels raised outside, or failing mortar and brickwork.
Traditional materials like lime mortar, soft bricks and solid stone are porous and allow capillary rise. You’ll also find suspended timber floors and shallow foundations that make it easier for ground moisture to transfer into walls.
External changes such as paving against walls, blocked air bricks or buried DPCs increase risk. A site inspection of ground levels, ventilation and the wall construction will pinpoint the specific vulnerability in your property.
Misdiagnosis and Related Issues
Condensation and penetrating damp often mimic rising damp, but they require different fixes. Condensation shows as widespread dampness on cold, internal surfaces and black mould on ceilings or high walls; it rarely matches the tide mark pattern of rising damp.
Penetrating damp comes from leaks, poor pointing or defective gutters and produces localised wet patches that don’t rise from floor level. Salt tests, hygroscopic staining and cavity inspections help separate these causes.
If a surveyor recommends wholesale replastering or an invasive chemical DPC without moisture readings, get a second opinion. Proper diagnosis relies on site measurements, historic changes to the building and testing for salts and moisture distribution.
Effective Treatment Solutions for Rising Damp
You need targeted action that removes moisture at source, halts salt migration and prevents recurrence. Treatments typically combine a moisture barrier, appropriate plastering, and improvements to ventilation and drainage.
Chemical Damp-Proof Courses
A chemical DPC injects a water-repellent fluid into holes drilled in the mortar course to form a horizontal barrier. You can expect contractor-applied silicone, silane or siloxane-based creams or emulsions; they displace water in the masonry pores and stop capillary rise when correctly installed.
Ensure the contractor drills at the correct height and spacing and injects to full coverage; missed joints or weak mortar can leave gaps. After injection you must allow time for the product to bed in before replastering and deal with hygroscopic salts that will remain in the wall fabric.
Installing Physical Damp-Proof Barriers
A physical DPC uses a membrane of bitumen, polyethylene or stainless-steel to create a permanent barrier across the wall cavity or through solid walls. This is often chosen where chemical DPC is unsuitable, such as very porous stone or where local regulations require a non-chemical option.
Installation requires lifting or cuttingaway floorboards and removing external render or internal plaster to insert the membrane; you should expect some structural and finishing work. Check that the barrier is lapped and sealed at all junctions and that builders re-establish ventilation paths to prevent trapped moisture.
Specialist Plastering and Replastering Methods
After a successful DPC, salt-contaminated plaster must be removed to a reliable margin above visible staining. Use a salt-resistant, breathable render such as a hydraulic lime or salt-retarding gypsum product for replastering, applied in appropriate thickness and in multiple coats.
Avoid impervious cement renders that trap moisture. Your plasterer should follow drying times and apply a vapour-permeable finishing coat; this allows remaining moisture to evaporate while preventing salt crystallisation on the new surface.
Improving Ventilation and Drainage
Improving air movement and ground drainage reduces the load on any DPC and speeds wall drying. You should check and clear external air bricks, fit airbricks or trickle vents where needed, and ensure internal extract fans work correctly in kitchens and bathrooms.
Externally, maintain gutters, falls and French drains to divert water away from foundations. Consider landscaping changes, damp-proof course at a higher level, and sump or drain repairs if groundwater or poor site drainage contributes to the problem.
Frequently Asked Questions
You will find clear signs, proven repairs, limits of chemical treatments, typical professional costs, realistic timeframes, and non-intrusive options tailored to older UK house types. Each answer focuses on what you can expect for specific periods and masonry.
What are the first signs of rising damp in historical UK properties?
Look for a tide mark or damp staining up to 1.5 metres from the floor where brick or plaster remains visibly darker than surrounding areas. Peeling or bubbling paint, crumbling plaster with white salt deposits (salts efflorescence), and a persistent musty odour are common early indicators.
Check timber skirting and floorboards for rot and damp stains near ground level. Recurrent mould growth low on internal walls despite ventilation also suggests moisture rising through the fabric.
Which damp proofing methods are most effective for Victorian homes?
Chemical damp-proof courses injected into the mortar bed remain widely effective for solid brick Victorian walls when installed correctly and with compatible materials. Physically installing a new damp-proof course (DPC) or replacing compromised brick courses can work when access and wall construction allow.
Combine a DPC with repointing using a compatible lime mortar and improving external drainage to reduce groundwater pressure. Internal plaster replacement with salt-resistant plaster after a successful DPC ensures long-term finishes.
Can chemical damp proof injections work on all types of old British masonry?
No. Chemical injections work best in solid, relatively homogeneous masonry like solid brick or stone with intact mortar paths. They are less reliable where there are continuous external moisture paths (failed gutters, high external ground levels), highly porous or friable stone, or where the wall has multiple construction layers.
You must assess mortar condition, wall thickness, and presence of internal render salts before relying solely on injections. A moisture and salt analysis plus a fabric survey determines whether injections are suitable.
What is the estimated cost of professionally treating rising damp in Edwardian houses?
Expect typical professional costs in England and Wales to range from about £800 to £3,500 for a standard single-room chemical DPC job, depending on access and plaster replacement needs. Whole-house interventions, including external works, repointing and specialist plastering, commonly fall between £3,000 and £12,000.
Costs rise if you require lime plastering, structural repairs, or specialist listed-building consent work. Always get itemised quotes from damp specialists and check references before committing.
How long does it take to successfully rectify rising damp issues in Georgian buildings?
Active damp-proofing works such as chemical injection and replacing internal plaster often complete in 1–5 days for a single room, subject to access and contractor availability. Allow several weeks for injected solutions to take effect and for new plaster and decorations to dry fully; drying times can extend to 8–12 weeks in thicker masonry.
If structural repairs, external drainage improvements or gradual salt clearance are needed, plan for several months of staged work. Factor in time for surveys, consent for listed features, and moisture testing before redecoration.
Are there any non-intrusive treatments for managing rising damp in Grade II listed structures?
You can use internal breathable, salt-tolerant plasters and lime-based finishes to manage wall moisture without removing historic fabric. Improved internal ventilation, controlled heating, and lowering internal ground levels where feasible also reduce symptoms without major intervention.
Electro-osmotic or other non-invasive systems offer limited, sometimes experimental, results and require trialling by a specialist with heritage experience. Always consult your conservation officer and obtain listed-building consent before applying new treatments.